How to Fix a Hole in Your Drywall
As solid as they might seem, the walls inside your house are actually surprisingly easy to damage, especially if they’re made from drywall. Hit the wall too hard with the back of a chair, for example, and you can be left with a pretty noticeable dent — or worse, a hole. Drywall holes can also be left behind when you remove nails or hangers that were used to hold up artwork or mirrors, or when you relocate electrical outlets or switches.
This May Also Interest You: How to Fix Drywall Cracks on the Wall or Ceiling
Fortunately, patching drywall is a pretty straightforward process that most homeowners can attempt successfully on their own. This is especially true if the hole is fairly small, as larger holes that require replacing entire sections of drywall are another story entirely. To fix a basic drywall hole in the wall, though, just get your tools and materials ready and follow this simple guide.
Tools and Materials
Fixing a hole in a wall might sound like you need a construction team's truckful of tools, but in reality, you should be able to get by with some combination of the following:
- Spackle
- Utility knife
- Putty knife
- Drywall patch
- Joint compound (also called "mud")
- Sandpaper
- Tape measure
- Drywall
Patching a Small Hole
If your drywall hole is smaller than a quarter, you should be able to repair it simply by using lightweight spackling.
Step 1: Fill the Hole
Use a putty knife to smear spackle into the hole. Make sure to fill the hole completely and “feather” the edges. This means that you smear the spackle very thinly outside the hole so that it is barely noticeable above the surface of the surrounding wall.
Step 2: Wait For It to Dry
The amount of time you need to wait should be specified on the packaging or in the instructions that came with your spackling product. Some spackle will start out as a dark color and turn white when it is fully dry.
Step 3: Sand the Area
Using fine-grit sandpaper, sand the entire area until the wall is smooth.
Step 4: Repeat If Necessary
If you find that there are more areas of the hole that need to be filled, you can repeat this process until the hole is completely filled and the surface is smooth. Then, you can paint over the area to match the rest of the wall.
Patching a Larger Hole
Larger holes will require a patch of one sort or another. If your hole is larger than a quarter but still smaller than about 8 inches across, you can use the following method to repair the hole.
Step 1: Prepare the Area
Drywall holes are rarely uniform, so you'll want to use your utility knife to slice into the edges of the hole to make them neat.
Step 2: Apply the Patch
Apply the correctly sized drywall patch on top of the hole. Do this by removing the adhesive backing on the patch and sticking it on top of the hole so that the damaged area is centered beneath the patch. Press the patch evenly around the hole so that it sticks to the wall.
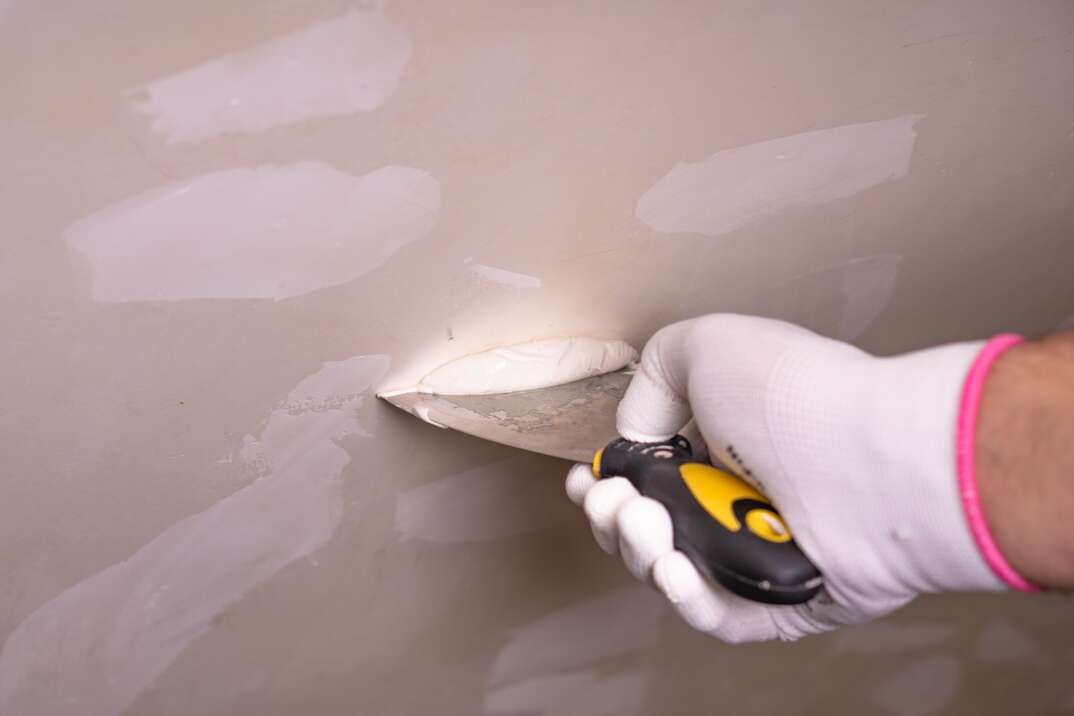
Step 3: Apply Mud
Apply your joint compound (mud) by smearing it on top of the patch with your putty knife. Apply a generous amount of mud on top of the hole and use a feathering technique as you move outward toward the solid wall. The patch is a screen through which some of the mud will penetrate. This is desirable because it helps you build up the thickness of the wall opposite the damage on the interior part of the drywall.
Step 4: Wait
Let the joint compound dry according to the package directions. This might take as long as 24 hours.
Step 5: Reapply
If the hole doesn't look as though it is filled in completely, or if the wall still looks unstable, reapply another coat of mud and wait the recommended amount of time for it to dry.
Step 6: Sand
Once the mud is dry, sand the area using fine-grit sandpaper until the wall is smooth. Prime and paint to match the wall if desired.
More Related Articles:
- How Much Does Drywall Cost?
- How to Fix Nail Holes in Walls: A 7-Step Guide
- How to Finish Drywall: Taping, Mudding and Sanding
- How to Hang Drywall: A 7-Step Overview
- Walls Looking Worse for Wear? Follow This 5-Step Wall-Washing Guide
Patching Even Larger Holes
If your drywall hole is even bigger than 8 inches across, you will need to reinforce the hole and create your own drywall patch.
Step 1: Make the Hole Uniform
Use your utility knife to cut around the edges of the hole until you achieve a shape that is square or rectangular.
Step 2: Measure It
Measure the exact size of the hole and transfer those measurements to a new piece of drywall with a pencil.
Step 3: Cut Drywall
Use your utility knife to cut a piece of drywall that is about 1 inch bigger on all sides than the actual hole.
Step 4: Score and Snap
Score the new piece of drywall on the front side along the exact measurements matching the hole. You do not want to cut all the way through the backing paper. Once the new piece of drywall is scored, use a quick snapping motion to break it along the cuts and remove the drywall, leaving the backer paper intact. This should give you a piece of drywall that is the exact shape of the hole with about a 1-inch border of paper around the edge.
Step 5: Apply Mud
Place joint compound all around the inside of the hole in the wall and on the wall itself around the edges of the opening.
Step 6: Insert the Piece of Drywall
Place the drywall patch into the hole with the paper side facing outward. Using your putty knife, drag along the paper to adhere it to the wall. You will force mud from beneath the paper by doing this. Wipe up the excess with an old rag.
Step 7: Wait, Then Mud Again If Needed
Wait for the joint compound to dry according to the package directions. Then, cover the entire patched area again with another skim coat if needed. This step is optional. If your first patch looks good, you can skip this step.
Step 8: Sand the Area
Once the mud is dry, sand the area with fine-grit sandpaper until smooth and paint to match the surrounding wall if desired.
Alternative Method for Patching Large Holes
Another option for patching a large section of drywall would be to use supports and screws. To accomplish this, you would still cut around the hole to make it even, as indicated in the steps above. This time, though, you would attach strips of wood behind the drywall by feeding them in through the hole and securing them with drywall screws. You can use 1-inch by 3-inch lumber or a strip of plywood for this purpose. Then, you would affix your drywall patch to the wooden supports or plywood using more screws. Once that is done — you guessed it — simply mud the entire patch, wait and sand until smooth.
Once your drywall patch is done, prime and then paint for a wall that should now hide all of the evidence!